Areas, Partial Views and Child Actions in ASP.NET MVC
Developers may organise their applications, build modular components, and improve code reuse by using Areas, Partial Views, and Child Actions in ASP.NET MVC. Let’s examine each of these ideas and how to employ them successfully:
Areas in ASP.NET MVC:
A huge ASP.NET MVC application can be divided up into manageable portions using areas. Within the application, each region represents a different functional area. You may designate several locations for the administration, user dashboards, or public-facing pages, for instance.
Right-click the project, pick “Add,” and then select “Area” from the context menu to create an area. Following that, you can give the region a name and designate a folder structure for it. It will have separate folders for its controllers, views, and models.
Areas facilitate better concern segregation and simplify the upkeep of sophisticated programmes.
Partial Views in ASP.NET MVC:
In order to display a portion of HTML content and C# code in various views throughout the application, partial views are reusable components.
You can build a partial view by adding a new view to the “Views” folder (or a subfolder) and naming it something like “_PartialView.cshtml.”
You can render a partial view within another view using the @Html.Partial or @Html.RenderPartial methods, passing the partial view’s name as an argument.
Child Actions in ASP.NET MVC:
Child actions are controller methods that return partial views. They come in handy when you need to render different elements of a view independently.
To create a child action, define a method in a controller that returns a PartialViewResult. You can use the ChildActionOnly attribute to ensure that the method can only be called as a child action and not directly as an HTTP request.
In your main view, you can call the child action using the @Html.Action or @Html.RenderAction methods, passing the name of the child action and any required parameters.
Advantages of utilising areas, partial views, and child actions
Utilizing areas, partial views, and child actions in ASP.NET MVC provides several advantages that can significantly enhance the development process and improve the overall architecture of your application. Here are some key benefits of using these features:
Modularity and Reusability:
Areas allow you to divide a large application into smaller functional sections, promoting modularity and separation of concerns. Each area can have its own set of controllers, views, and models, making it easier to manage and maintain specific features.
Partial views encapsulate reusable components, such as navigation bars, headers, footers, or widgets. Once created, you can include them in multiple views across the application, reducing duplication of code and promoting reusability.
Organization and Maintainability:
By structuring your application with areas, you create a clear organization that improves code maintainability and makes it easier for developers to navigate and understand the application’s structure.
Partial views and child actions help to decompose complex views into smaller, manageable components. This separation of concerns leads to cleaner code and makes it easier to maintain and update specific parts of a page independently.
Code Separation and Readability:
Areas encourage the separation of different functional parts of the application, reducing code coupling and increasing code readability.
Partial views and child actions enable you to separate the presentation logic from the main view, enhancing the readability and maintainability of the code.
Code Reusability and DRY Principle:
Areas, partial views, and child actions promote the “Don’t Repeat Yourself” (DRY) principle, allowing you to reuse code across different areas or views.
Instead of duplicating code for common UI components, you can create partial views once and then use them in multiple views, reducing development effort and avoiding inconsistencies.
Performance Optimization:
By utilizing child actions, you can optimize the rendering of complex views by rendering specific parts of a page separately, reducing the overall load time and enhancing user experience.
Partial views can help optimize rendering performance by allowing you to cache the output of specific components that are unlikely to change frequently.
Enhanced Testing and Debugging:
The use of areas allows for better isolation and targeted testing of specific functional sections, making unit testing and debugging more focused and effective.
Partial views and child actions can be tested independently, making it easier to verify the correctness of individual components.
In summary,, the strategic use of areas, partial views, and child actions in ASP.NET MVC not only fosters reusability, performance optimisation, and increased testing capabilities but also enhances code organisation and maintainability. Building scalable, stable, and modular web applications that are simpler to maintain and develop over time is made possible by these qualities.
Example
Consider the following scenario:
Assume you have an e-commerce site with distinct sections for the product catalogue and the user dashboard. You can construct partial views for common elements such as navigation, headers, and footers and then reuse them across several views inside each section. You can also call a child action in the header partial view to display the user’s shopping basket.
You may improve the flexibility and maintainability of your ASP.NET MVC application by efficiently utilising Areas, Partial Views, and Child Actions, resulting in a more organised and efficient development process.
Click here , if you look out for training in Asp.net Core and other Dot Net technology.
SQL & C# Dot Net – Online Training in India:
SQL and DOT NET Technologies:
SQL and DOT NET are two distinct technologies that are frequently used in software development. SQL is an abbreviation for Structured Query Language, a programming language used to manage and manipulate relational databases. DOT NET is a software development framework that allows you to create and run applications on a variety of platforms, including Windows, macOS, and Linux.
SQL is widely used in relational databases such as MySQL, Oracle, and Microsoft SQL Server to manage data. SQL allows developers to use a standardised syntax to create, modify, and query databases. SQL allows for a wide range of operations, such as data insertion, deletion, modification, and retrieval. SQL is also used to analyse data, report on it, and gather business intelligence.
DOT NET is a well-known software development framework that is used to create desktop, web, and mobile applications. DOT NET provides a set of libraries, tools, and runtime environments that simplify the development, testing, and deployment of applications. DOT NET supports a variety of programming languages, including C#, F#, and Visual Basic, and it can be used to create applications for a variety of platforms, including Windows, macOS, Linux, and mobile devices.
SQL and DOT NET, when used together, can provide powerful solutions for managing and manipulating data in applications. For example, a DOT NET application can use SQL to manage its data in a relational database, making it easier to store and retrieve data. Furthermore, DOT NET includes a set of libraries and tools that make it easier to integrate with SQL databases, allowing developers to create applications that can handle large amounts of data while also supporting complex data analysis and reporting.
Future of DOT NET:
Dot Net has a broad scope, and its future appears bright. Dot net is the future of Windows and other operating systems development.
It is a comprehensive framework for developing large enterprise-scale and scalable software applications.
Dot Net is a modern, flexible, fast, and secure technology that integrates well with other technologies.
Our Training Institute – Maria Academy
With our online course, you can broaden your career opportunities in SQL, C#, and Dot Net Technology.
A C# course can take you to the next skill level whether you are an experienced programmer looking to expand your skills and knowledge or you are just getting started in object-oriented programming. Discover what you can do with C# by learning from experienced instructors at Maria Academy.
Our experts will provide you with the SQL training you require to become a database professional. This course is also ideal for advanced engineers who need to refresh their knowledge. SQL courses aren’t just for engineers; they’re also for business analysts who need to learn about new trends and markets.
We will enthusiastically teach you SQL, C# & DOT NET. Our trainers will be more interactive, addressing real-world problems and providing solutions. Students will be able to improve their programming skills through hands-on programming. Trainers must have a minimum of six years of experience. The curriculum was created to cover the entire C# learning process. A practical test and periodic exercises will be provided to help students improve their programming skills. By the end of the training, you should be able to provide a solution for a real-world scenario using your programming skills.
In terms of placement, course, syllabus, and practical, we are the best C#.NET Training Providers in India.
“c++” is the result of the evolution of “c.” C++’s evolution continues. C# is a modern, dependable, and robust programming language. C#.net works with the Microsoft.NET framework. Delegates, Interface, and Abstraction are just a few of the cool features that have propelled C#.net to the top of the world. C# has inherited the best characteristics of its forefathers, including C, C++, and Java. Because of their best features, C# continues to be the solution provider for various hypothetical problems. C#.net was derived from various object-oriented programming extracts.
Differences between ASP.NET Core and ASP.NET Framework
ASP.NET Core and ASP.NET Framework are both web application frameworks developed by Microsoft, but there are some significant differences between the two. Here are some of the key differences between ASP.NET Core and ASP.NET Framework:
- Open-source and community-driven: ASP.NET Core is open-source and community-driven, with contributions from developers around the world. ASP.NET Framework is also open-source, but Microsoft is the primary contributor.
- Cross-platform support: ASP.NET Core is designed to be cross-platform and can run on Windows, macOS, and Linux. ASP.NET Framework, on the other hand, is designed to run only on Windows.
- Modular design: ASP.NET Core has a modular design, with a lightweight and customizable architecture that allows developers to choose only the components they need. ASP.NET Framework has a monolithic design and includes a large set of pre-built components, which can result in larger and slower applications.
- Performance: ASP.NET Core is optimized for performance and can handle a larger number of requests per second than ASP.NET Framework. This is due to its lightweight design, which reduces overhead and allows it to run more efficiently.
- Dependency Injection: ASP.NET Core includes built-in support for Dependency Injection, which makes it easier to manage dependencies and improve code maintainability. ASP.NET Framework does not include built-in support for Dependency Injection, although it is possible to implement it using third-party libraries.
- Target platforms: ASP.NET Core is designed to target multiple platforms, including cloud, mobile, and desktop, while ASP.NET Framework is primarily targeted at web applications.
In summary, ASP.NET Core and ASP.NET Framework are both powerful web application frameworks, but they have some significant differences in terms of cross-platform support, open-source and community-driven development, modular design, performance, and target platforms. The choice between the two depends on the requirements of the project and the preferences of the developer.
Dot net CRUD operation with Ms access database
Save the MS access db as db1.mdb file (Access 2000 Database file format) as shown below.
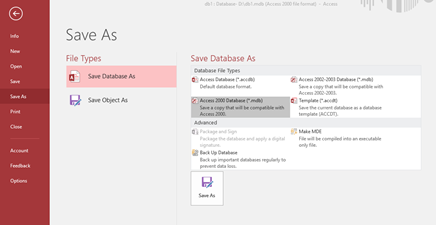
-
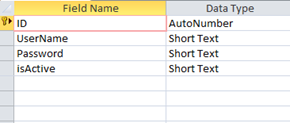
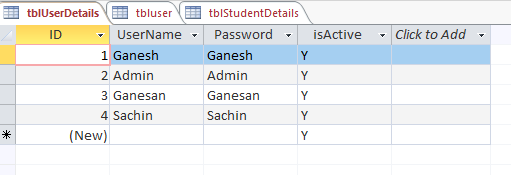
Create a table tblUserDetails in MS access with below columns.
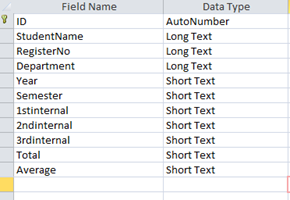
Create a table tblStudentDetails with the below columns.
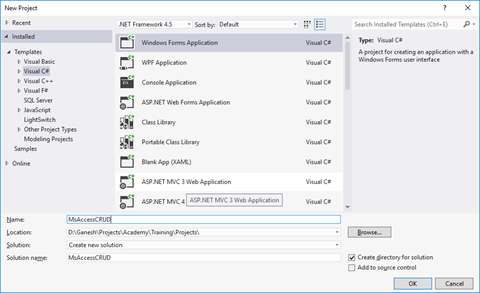
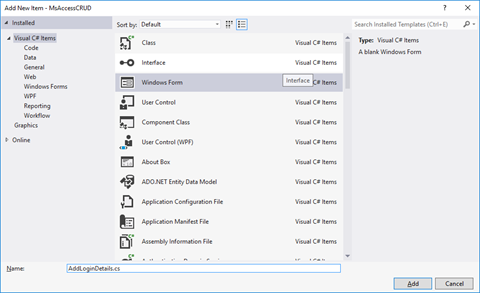
Create a new windows Application project MsAccessCRUD
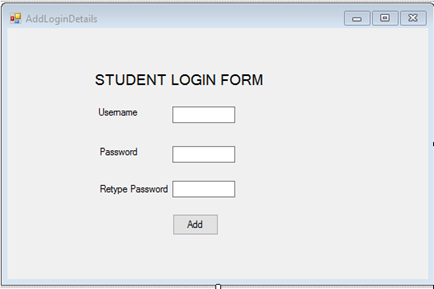
Add a windows form AddLoginDetails.cs
Design the form as below,
Replace the AddLoginDetails class file as below,
| public partial class AddLoginDetails : Form { public AddLoginDetails() { InitializeComponent(); } private void btnLogin_Click(object sender, EventArgs e) { System.Data.OleDb.OleDbConnection conn = new System.Data.OleDb.OleDbConnection(); conn.ConnectionString = @”Provider=Microsoft.Jet.OLEDB.4.0;” + @”Data source= D:\db1.mdb”; OleDbCommand cmd = new OleDbCommand(); cmd.CommandType = CommandType.Text; cmd.CommandText = @”Insert Into tblUserDetails(UserName,[Password])VALUES(‘”+txtUserName.Text+”‘,'”+txtPassword.Text+”‘)”; cmd.Connection = conn; conn.Open(); cmd.ExecuteNonQuery(); System.Windows.Forms.MessageBox.Show(“Record Successfully Created”); StudentLogin objStudentLogin = new StudentLogin(); objStudentLogin.Show(); this.Hide(); conn.Close(); } } |
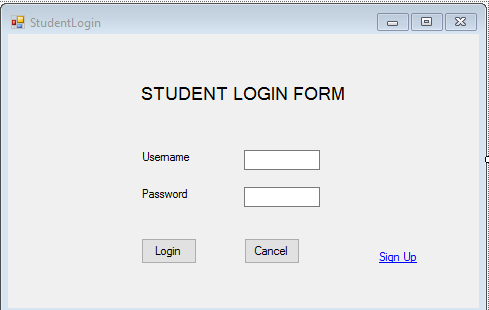
Add New form StudentLogin.cs and design as below,
Replace the StudentLogin Class with below code,
| public partial class StudentLogin : Form { public StudentLogin() { InitializeComponent(); } private void Button2_Click(object sender, EventArgs e) { // txtUserName.Text System.Data.OleDb.OleDbConnection conn = new System.Data.OleDb.OleDbConnection(); conn.ConnectionString = @”Provider=Microsoft.Jet.OLEDB.4.0;” + @”Data source= D:\db1.mdb”; OleDbCommand cmd = new OleDbCommand(); cmd.CommandType = CommandType.Text; cmd.CommandText = @”select * from tblUserDetails where Password='” +txtPassword.Text +”‘”; cmd.Connection = conn; conn.Open(); OleDbDataReader OleDBDR = cmd.ExecuteReader(); while (OleDBDR.Read()) { string value= OleDBDR[0].ToString(); System.Windows.Forms.MessageBox.Show(“Login Successful”); ShowStudentDetails objform = new ShowStudentDetails(); objform.Show(); this.Hide(); } conn.Close(); } private void Button1_Click(object sender, EventArgs e) { } private void linkLabel1_LinkClicked(object sender, LinkLabelLinkClickedEventArgs e) { AddLoginDetails obj = new AddLoginDetails(); obj.Show(); this.Hide(); } } |
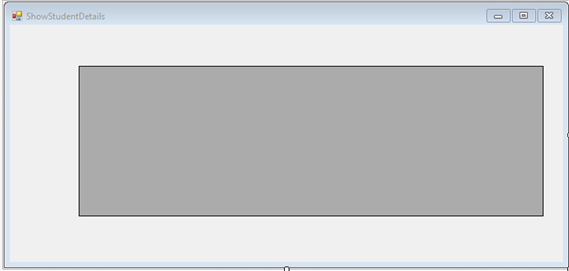
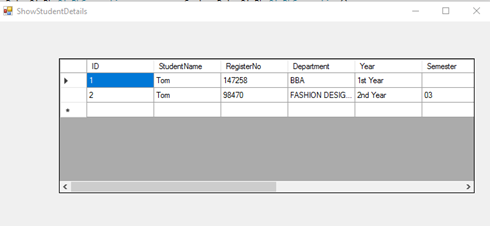
Add a new form ShowStudentDetails.cs and design the form as below,
Replace the ShowStudentDetails.cs class file with below code,
| public partial class ShowStudentDetails : Form { public ShowStudentDetails() { InitializeComponent(); } private void ShowStudentDetails_Load(object sender, EventArgs e) { System.Data.OleDb.OleDbConnection conn = new System.Data.OleDb.OleDbConnection(); conn.ConnectionString = @”Provider=Microsoft.Jet.OLEDB.4.0;” + @”Data source= D:\db1.mdb”; OleDbCommand cmd = new OleDbCommand(); cmd.CommandType = CommandType.Text; cmd.CommandText = @”select * from tblStudentDetails”; cmd.Connection = conn; conn.Open(); OleDbDataAdapter ada = new OleDbDataAdapter(cmd); DataSet ds = new DataSet(); ada.Fill(ds); dgvStudentdetails.DataSource = ds.Tables[0]; conn.Close(); } } |
The solution explorer will look as below,
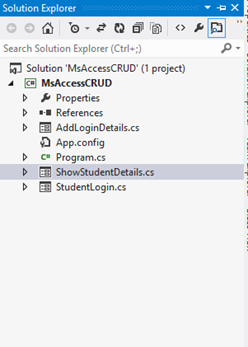
Replace the connection string for Ms access database before running the solution, now its d:\db1.mdb
The Output as below,
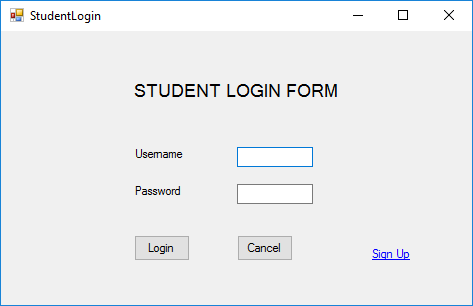
Click on Sign Up,

Click Add.
Ms Access DB as below,
Click below to download the solution,
Send mail to users from gmail account using c#.net
Document by Alagappan -ganesanva@hotmail.com – + 919042710472
Click on File –> New Project in Visual Studio. Enter the solution name as MailUser.
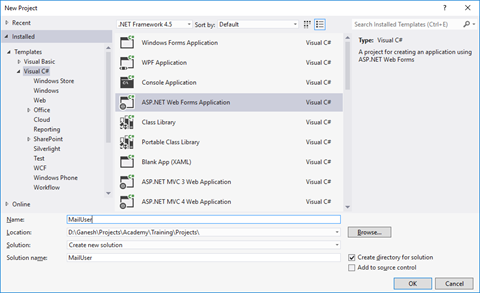
Click OK
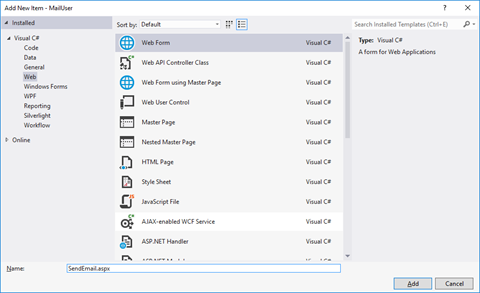
Right Click on the Project and add new item.
Add new form with name SendEmail.aspx
Put / Replace the below code in SendEmail.aspx
| <!DOCTYPE html> <html xmlns=”http://www.w3.org/1999/xhtml”> <head runat=”server”> <title></title> </head> <body> <form id=”form1″ runat=”server”> <div> <table border=”0″ cellspacing=”2″ cellpadding=”2″> <tr> <td> Email To </td> <td> <asp:TextBox ID=”txtMailTo” runat=”server”></asp:TextBox> </td> </tr> <tr> <td> Subject </td> <td> <asp:TextBox ID=”txtSubject” runat=”server”></asp:TextBox> </td> </tr> <tr> <td> Body </td> <td> <asp:TextBox ID=”txtBody” runat=”server” TextMode=”MultiLine”></asp:TextBox> </td> </tr> <tr> <td> </td> <td> <asp:Button ID=”btnSend” runat=”server” Text=”Send” OnClick=”btnSend_Click” /> </td> </tr> </table> </div> </form> </body> </html> |
Put / Replace the below code In SendEmail.aspx.cs
| public partial class SendEmail : System.Web.UI.Page { protected void Page_Load(object sender, EventArgs e) { } protected void btnSend_Click(object sender, EventArgs e) { string result=SendEmailtousers(txtMailTo.Text, txtSubject.Text, txtBody.Text); Response.Write(result); } protected string SendEmailtousers(string toAddress, string subject, string body) { string result = “Message Sent Successfully..!!”; string senderID = WebConfigurationManager.AppSettings[“SenderID”];// use sender’s email id here.. string senderPassword = WebConfigurationManager.AppSettings[“SenderPassword”]; // sender password here… try { SmtpClient smtp = new SmtpClient { Host = “smtp.gmail.com”, Port = 587, EnableSsl = true, DeliveryMethod = SmtpDeliveryMethod.Network, Credentials = new System.Net.NetworkCredential(senderID, senderPassword), Timeout = 30000, }; MailMessage message = new MailMessage(senderID, toAddress, subject, body); message.CC.Add(WebConfigurationManager.AppSettings[“CCMail”]); smtp.Send(message); } catch (Exception ex) { result = “Error sending email.!!!””; } return result; } } |
Add the below code in web.config below Connectionstrings tag
| <appSettings> <add key=”SenderID” value=”ganesvija@gmail.com”/> <add key=”SenderPassword” value=”*****”/> <add key=”CCMail” value=”ganesanva@hotmail.com”/> </appSettings> |
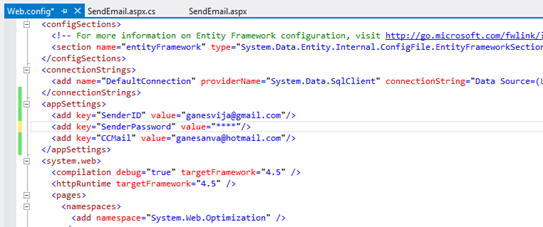
Replace **** with actual password in key SenderPassword.
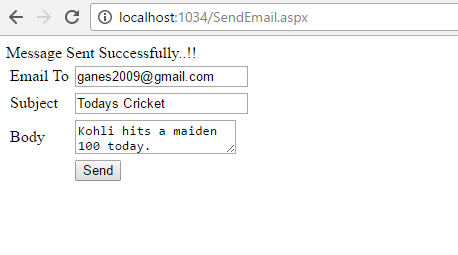
Run the solution.
The Output as below,
GMAIL inbox,

Note:
In order to trigger mail from client, Enable this on the From Address Gmail account.
Turn on Allow for Less Secure apps.
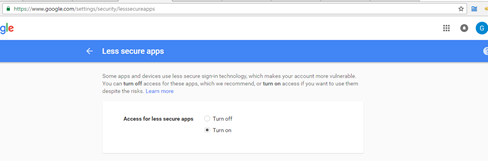
https://www.google.com/settings/security/lesssecureapps
Reference:
https://support.google.com/accounts/answer/6010255?hl=en
Click below to download the solution,
https://1drv.ms/u/s!ArddhCoxftkQg7UPuVICB-batxhXag
Real Time Dot Net Training Centers in Chennai
There is a wide market for freshers in software companies, especially in dot net field. Many real time dot net training centers are available in Chennai. Experts in dot net training centers train students in Microsoft technologies to excel in IT sector. Trainers in dot net training centers have more than four years of experience in IT sector. The real time dot net training centers provide three types of services which include dot net training, share point training and web development. Training on dot net is given to students for job assistance purpose and training is given till the students are familiar with the technology. The training centers give a complete guidance on software development life cycle. Regular workshops on dot net technology have been conducted for students and students have their own choice of choosing timing.
Trainers in dot net training centers provide assistance for Microsoft certification such as Microsoft certified technology specialist for dot net and SQL server. Both online and offline training classes are available for dot net. Online sessions are conducted via Skype, students can save money and time by adopting online dot net training. The dot net course include dot net architecture, OOPS concept, web and windows application with visual studio, connect Sql server database using ado.net, entity framework. Apart from this dot net training centers give training in web services, deploying dot net applications, to build Asp.net web application with MVC architecture.
Practices on design patterns based on dot net with programming share point 2010 application. C# dot net programming with real time examples and web applications. Dot trainers mainly focus on training people to excel well in dot net to meet world class standards. The real time dot net centers have well equipped classrooms, broad band facilities, course materials. Students can get real time exposure as all trainers are good at their teaching skills. The training centers provide course materials for all students who enroll under the training program, apart from this they also train persons for resume preparation. Experts in real time dot net training centers train persons based on current technology requirement. Based on market strategy students can avail the best options from experts and can develop themselves in dot net technology.
Training batches are small so that trainers give more attention to each individual to train persons to become expert in that field and also they can clarify student doubts. Based on their flexi timing students can avail the training. The trainers in dot net training centers prepare students to face the interview. Apart from coaching they train students from interview point. Students can have both course based training as well as interview based training. Certificates are issued to all the students after their successful completion of the course. The certificates enable the students to get placed in software companies. Students who have been trained by the dot net training centers excel well in programming skills. In addition to this they develop knowledge in software related to dot net applications.
State management in Asp.net
Document by Vairavan – Ganesanva@hotmail.com – +919042710472
There are 2 types of state management
1.Server side
2.Client Side
Client Side
- View State
- Hidden Fields
- Cookies
- Query strings
Server Side
- Application state
- Session state
View state
It allows to maintain the value with in the page
Hidden Fields
It is the control in Asp.net used to store value with in the page. It does not shows visibility in the page.
Cookies
It is the small amount of data stored in client browser session
Query string
IT allows to pass the data from one page to another in the browser URL.
Application state:
Asp.net allows to save values using Application state in HttpApplicationstate class.
Session State:
It allows to store data in the server side using HttpSessionState class.
Create a new Project File –>New Project in Visual studio
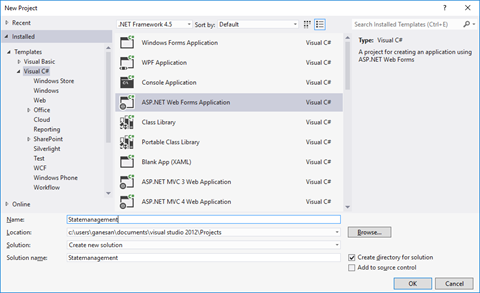
Click ok.
Right Click on the solution and Add New Item.
Select Web form and Name GetValues.aspx.

Add one another form as SetValues.aspx
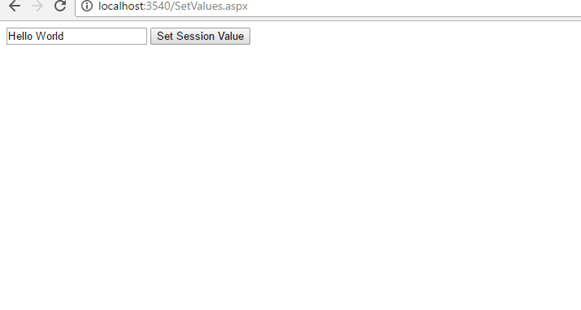
Put / Replace the below HTML in SetValues.aspx
| <!DOCTYPE html> <html xmlns=”http://www.w3.org/1999/xhtml”> <head runat=”server”> <title></title> </head> <body> <form id=”form1″ runat=”server”> <div> <asp:TextBox ID=”txtsessionvalue” runat=”server”></asp:TextBox> <asp:Button ID=”btnSetSession” runat=”server” Text=”Set Session Value” OnClick=”btnSetSession_Click” /> </div> </form> </body> </html> |
Put / Replace the below code in SetValues.aspx.cs
| public partial class SetValues : System.Web.UI.Page { protected void Page_Load(object sender, EventArgs e) { } protected void btnSetSession_Click(object sender, EventArgs e) { Session[“Uservalue”] = txtsessionvalue.Text; Response.Redirect(“GetValues.aspx?ID=2”); } } |
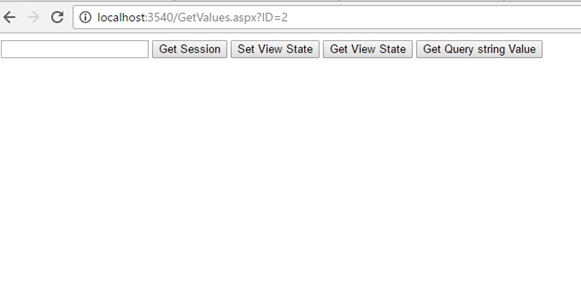
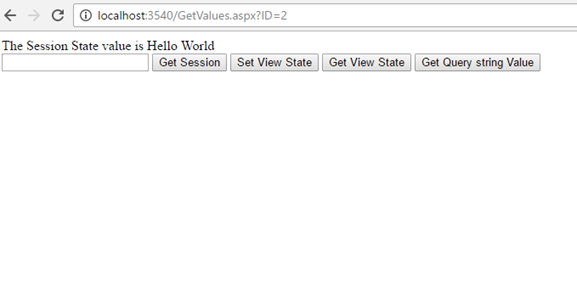
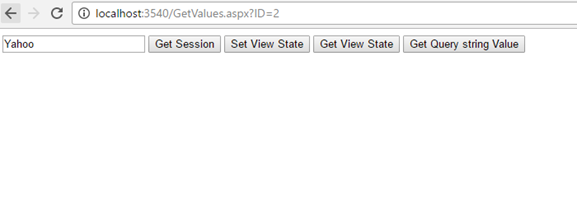
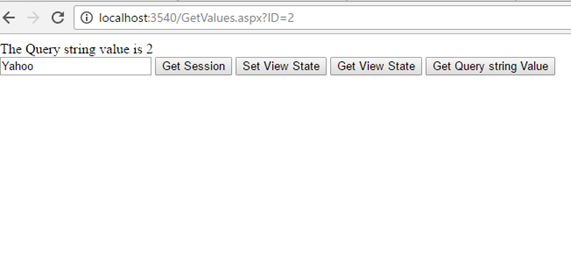
Put / Replace the below HTML in GetValues.aspx
| <!DOCTYPE html> <html xmlns=”http://www.w3.org/1999/xhtml”> <head runat=”server”> <title></title> </head> <body> <form id=”form1″ runat=”server”> <div> <asp:TextBox ID=”txtviewstate” runat=”server”></asp:TextBox> <asp:Button ID=”btnGetSession” runat=”server” Text=”Get Session” OnClick=”btnGetSession_Click” /> <asp:Button ID=”btnSetViewState” runat=”server” Text=”Set View State” OnClick=”btnSetViewState_Click” /> <asp:Button ID=”btnGetViewState” runat=”server” Text=”Get View State” OnClick=”btnGetViewState_Click” /> <asp:Button ID=”btnGetQuerystringvalue” runat=”server” Text=”Get Query string Value” OnClick=”btnGetQuerystringvalue_Click” /> </div> </form> </body> </html> |
Put / Replace the below code in GetValues.aspx.cs
| public partial class GetValues : System.Web.UI.Page { protected void Page_Load(object sender, EventArgs e) { } protected void btnGetSession_Click(object sender, EventArgs e) { string sessionvalue = (string)Session[“Uservalue”]; Response.Write(“The Session State value is ” + sessionvalue); } protected void btnSetViewState_Click(object sender, EventArgs e) { ViewState[“data”] = txtviewstate.Text; } protected void btnGetViewState_Click(object sender, EventArgs e) { string viewstatevalue = (string)ViewState[“data”]; Response.Write(“The view State value is “+viewstatevalue); } protected void btnGetQuerystringvalue_Click(object sender, EventArgs e) { string QueryStringvalue = (string)Request.QueryString[“ID”]; Response.Write(“The Query string value is ” + QueryStringvalue); } } |
The Output as below,

Click below to download the solution,
https://1drv.ms/u/s!ArddhCoxftkQg617pH3vPsuhyrHvDA
CRUD in ASP.net web application using Stored procedure
Document by Maria Academy – mariatrainingacademy@gmail.com – +919042710472
Create Database in SQL server as below,
| Create database StudentDB |
Create StudentDetails table using the below script,
| CREATE TABLE [dbo].[StudentDetails]( [StudentId] [int] IDENTITY(1,1) NOT NULL, [StudentName] [varchar](100) NULL, [Age] [int] NULL ) ON [PRIMARY] |
Run the below Stored Procedures in SQL Server,
| create Proc [dbo].[Ins_StudentDetails] @StudentName varchar(100), @Age int as begin INSERT INTO [StudentDetails] ([StudentName] ,[Age]) VALUES (@StudentName ,@Age) |
| create Proc [dbo].[Select_StudentDetails] as begin select * from StudentDetails end |
| create Proc [dbo].[Update_StudentDetails] @StudentId int, @StudentName varchar(100), @Age int as begin UPDATE [StudentDetails] SET [StudentName] = @StudentName ,[Age] = @Age WHERE StudentId=@StudentId end |
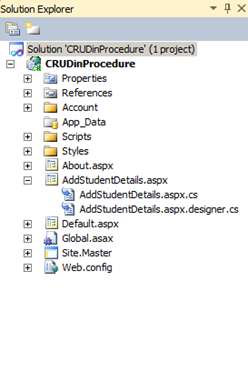
Create a new Asp.net web application CRUDinProcedure as below,
File -> New Project
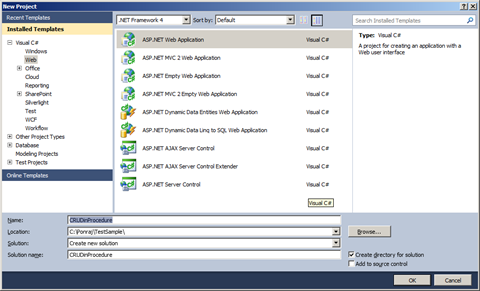
Click OK.
Solution Explorer as below,
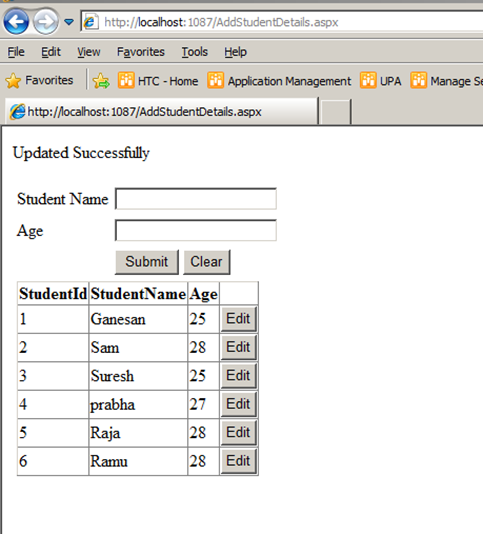
Add new Page AddStudentDetails.aspx
Put / Replace the below code in AddStudentDetails.aspx
| <html xmlns=”http://www.w3.org/1999/xhtml”> <head id=”Head1″ runat=”server”> <title></title> </head> <body> <form id=”form1″ runat=”server”> <div> <table border=”0″ cellspacing=”2″ cellpadding=”2″> <tr> <td> <asp:Label ID=”lblStudentName” runat=”server” Text=”Student Name”></asp:Label> </td> <td> <asp:TextBox ID=”txtStudentName” runat=”server”></asp:TextBox> </td> </tr> <tr> <td> <asp:Label ID=”lblAge” runat=”server” Text=”Age”></asp:Label> </td> <td> <asp:TextBox ID=”txtAge” runat=”server”></asp:TextBox> </td> </tr> <tr> <td></td> <td> <asp:Button ID=”btnSubmit” runat=”server” Text=”Submit” OnClick=”btnSubmit_Click” /> <asp:Button ID=”btnUpdate” runat=”server” Text=”Update” OnClick=”btnUpdate_Click” /> <asp:Button ID=”btnClear” runat=”server” Text=”Clear” OnClick=”btnClear_Click” /> <asp:HiddenField ID=”hfId” runat=”server”></asp:HiddenField> </td> </tr> <tr> <td colspan=”2″> <asp:GridView ID=”grvStudentDetails” runat=”server” AutoGenerateColumns=”false”> <Columns> <asp:BoundField DataField=”StudentId” HeaderText=”StudentId” /> <asp:BoundField DataField=”StudentName” HeaderText=”StudentName” /> <asp:BoundField DataField=”Age” HeaderText=”Age” /> <asp:TemplateField> <ItemTemplate> <asp:Button ID=”btnEdit” runat=”server” Text=”Edit” OnClick=”btnEdit_Click” /> </ItemTemplate> </asp:TemplateField> </Columns> </asp:GridView> </td> </tr> </table> </div> </form> </body> </html> |
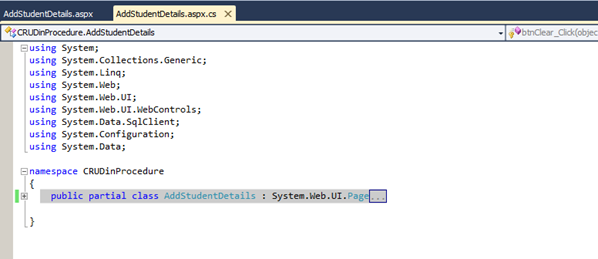
Replace the below code in AddStudentDetails.aspx.cs,
| public partial class AddStudentDetails : System.Web.UI.Page { SqlConnection con = new SqlConnection(ConfigurationManager.ConnectionStrings[“DefaultConnection”].ToString()); protected void Page_Load(object sender, EventArgs e) { if (!Page.IsPostBack) { BindGrid(); } } private void BindGrid() { btnSubmit.Visible = true; btnUpdate.Visible = false; SqlCommand cmd = new SqlCommand(“Select_StudentDetails”, con); cmd.CommandType = CommandType.StoredProcedure; SqlDataAdapter ada = new SqlDataAdapter(cmd); DataSet ds = new DataSet(); ada.Fill(ds); grvStudentDetails.DataSource = ds.Tables[0]; grvStudentDetails.DataBind(); } protected void btnSubmit_Click(object sender, EventArgs e) { con.Open(); SqlCommand cmd = new SqlCommand(“Ins_StudentDetails”, con); cmd.CommandType = CommandType.StoredProcedure; cmd.Parameters.Add(“@StudentName”, SqlDbType.VarChar).Value = txtStudentName.Text; cmd.Parameters.Add(“@Age”, SqlDbType.Int).Value = txtAge.Text; int result = cmd.ExecuteNonQuery(); if (result > 0) { Response.Write(“Inserted Successfully”); } con.Close(); BindGrid(); btnClear_Click(null, null); } protected void btnEdit_Click(object sender, EventArgs e) { Button btn = (Button)sender; //Get the row that contains this button GridViewRow gvr = (GridViewRow)btn.NamingContainer; hfId.Value = gvr.Cells[0].Text; txtStudentName.Text = gvr.Cells[1].Text; txtAge.Text = gvr.Cells[2].Text; btnSubmit.Visible = false; btnUpdate.Visible = true; } protected void btnUpdate_Click(object sender, EventArgs e) { con.Open(); SqlCommand cmd = new SqlCommand(“Update_StudentDetails”, con); cmd.CommandType = CommandType.StoredProcedure; cmd.Parameters.Add(“@StudentId”, SqlDbType.Int).Value = hfId.Value; cmd.Parameters.Add(“@StudentName”, SqlDbType.VarChar).Value = txtStudentName.Text; cmd.Parameters.Add(“@Age”, SqlDbType.Int).Value = txtAge.Text; int result = cmd.ExecuteNonQuery(); if (result > 0) { Response.Write(“Updated Successfully”); } con.Close(); BindGrid(); btnClear_Click(null, null); } protected void btnClear_Click(object sender, EventArgs e) { txtStudentName.Text = string.Empty; txtAge.Text = string.Empty; hfId.Value = string.Empty; } } |
Screenshot as below,
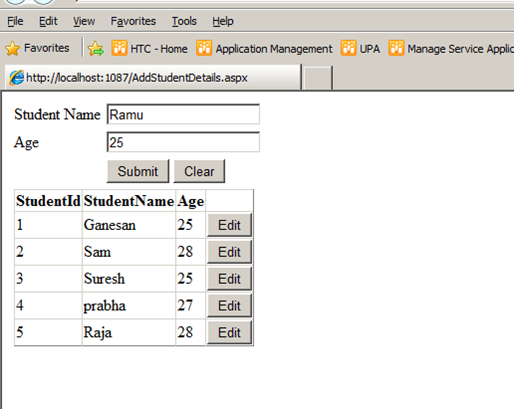
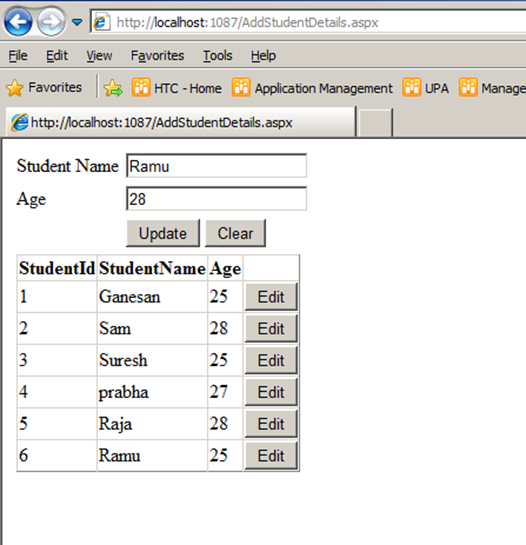
The Output will be as below,

Click below to download the solution,
https://1drv.ms/u/s!ArddhCoxftkQg6of7HjHOGOkB8IMXA
Dot net / SharePoint freelance Consultants in Chennai
Document by Ganesan – Ganesanva@hotmail.com – +919042710472
Given the huge demand for dot net and SharePoint applications today and the growing importance of freelancers across the city, .net and SharePoint freelancers in Chennai have engaged in providing the best available professional coaching in the software applications. The job opportunities for dot net with certification have significantly increased the number of .net freelancers in Chennai. Whether it is for professional or educational purposes, it is advisable to take a Dot net Freelance trainer in Chennai to meet the ever-changing demands of corporates and educational systems.
Hiring a Microsoft certified trainer in Chennai helps with professional coaching on Microsoft technologies such Asp.Net, C#.Net, SQL server etc. And in today’s digitalized world, the virtual presence of the trainers in substantial enough for an expert coaching on the applications. An online Dot net trainer uses the best practices of the industry to ensure dot net and SharePoint solutions meet business and educational needs of contemporary period.
A certified Dot net corporate trainer in Chennai combines the passion for technological innovation and deep platform expertise to ensure that proper training is delivered. The key focus of an online Dot net trainer in Chennai is to equip individuals leverage dot net and SharePoint technologies effectively to meet the professional and educational requirements. Young and dynamic professional and aspiring students can utilize the services of many Dot net part time consultants in Chennai to handle challenging and innovative projects. Further, given the array of opportunities in SharePoint and dot net, career as a Freelance SharePoint developer in Chennai or as an asp.net MVC consultant in Chennai holds a lot of promise for the future.
Today’s competitive market has brought dot net and SharePoint professionals to the forefront. A few years ago, a dot net or a SharePoint consultant in Chennai would have been just another consultant but today dot net and SharePoint developers have defined the career path of many individuals and professional services. Being ahead of the industry and constantly upgrading in the latest versions, dot net and SharePoint developers have been and are the preferred vendors for many corporates and students for their training and educational needs.
Along with a good demonstration of how projects are developed in real-time environment, a Microsoft certified trainer in Chennai imparts confidence and knowledge of technical skills for both freshers and working professionals and also ensures that the sessions are well structured and interactive.
With the shifting expectations of the IT industry and education, the ecosystems of dot net and SharePoint and the range of professionalism exhibited by dot net and SharePoint trainers have become more radical and created excitement and interest in learning more about the applications.
Asp.net MVC Course content
Document by Vairavan – enquiry@softwaretraininginchennai.com – + 919042710472
- MVC Architecture
- Benefits of Asp.net MVC
- Explanation on Model, View and Controller.
- Filters in MVC
- View models
- JQuery and JavaScript
- Entity Framework with Asp.net
- Code First Approach
- Database First Approach
- POCO Generator
- Data Annotation in MVC
- Custom Data Annotation
- Textbox, Option button ,List box ,Dropdown controls in MVC
- Ajax call in MVC
- Dependency Injection
- MVC with Bootstrap controls
- Layered Architecture in MVC
- Working with Areas
- Partial Views
- Working with Web api
- WCF Consumption in ASP.net MVC
- Convert Asp.net web application to MVC application
- MVC with Angular JS
- Sample Project on MVC
Recent Posts
Categories
- All
- Angularjs training in Chennai
- ASP.NET Core
- dot net training
- dot net training in chennai
- dotnet full stack developer
- Free dotnet training
- information on dotnet
- Learn Java in chennai
- Learn Python at Karaikudi
- learn python online
- learn python online from chennai
- Linq Queries in .net
- mutual funds
- MVC Training Tutorials
- PHP Training in Chennai
- pmp training online
- power apps online training
- Python Training Online
- share market
- Sharepoint framework online training
- SharePoint Freelancers in Chennai
- software testing
- spfx online training
- Stock market
- Uncategorized