CRUD operation in Client side object model C#.net
Document by Ganesanva@hotmail.com – + 919042710472
This Blog helps you to do CSOM Crud operation in SharePoint 2010 using Managed C# code.
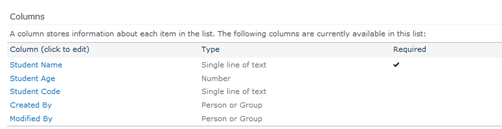
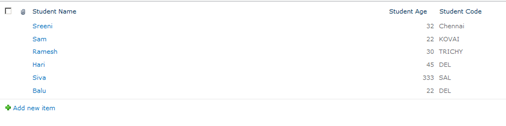
Create a List “Student Details” in Share point as shown below,
Create a new Console Application as shown below,
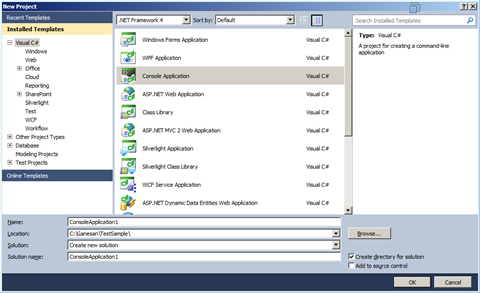
Click Ok.
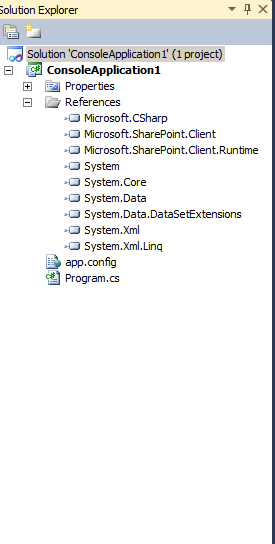
Add References in the Solution as shown in Solution Explorer,
Replace the Class Program with the below code,
|
class Program { static void Main(string[] args) { string siteUrl = “http://htc:7004/“; ClientContext clientContext = new ClientContext(siteUrl); List oList = clientContext.Web.Lists.GetByTitle(“Student Details”); startconsole: Console.WriteLine(“Enter your Option:”); Console.WriteLine(“1. Create New item in Student Details List”); Console.WriteLine(“2. Update item in Student Details List”); Console.WriteLine(“3. Get list of items in Student Details List”); Console.WriteLine(“Enter 1 or 2 or 3”); int optionvalue = Convert.ToInt32(Console.ReadLine()); if (optionvalue == 1) { Console.WriteLine(“Enter EStudent Name”); string EmpName = Console.ReadLine(); Console.WriteLine(“Enter Student Age”); string Age = Console.ReadLine(); Console.WriteLine(“Enter Student Code”); string Code = Console.ReadLine(); ListItemCreationInformation itemCreateInfo = new ListItemCreationInformation(); ListItem oListItem = oList.AddItem(itemCreateInfo); oListItem[“Title”] = EmpName; oListItem[“Student_x0020_Age”] = Age; oListItem[“Student_x0020_Code”] = Code; oListItem.Update(); clientContext.ExecuteQuery(); Console.WriteLine(“Inserted successfully”); } else if (optionvalue == 2) { CamlQuery oquery = new CamlQuery(); ListItemCollection oListItemCollection = oList.GetItems(oquery); clientContext.Load(oListItemCollection); clientContext.ExecuteQuery(); Console.WriteLine(“Id” + “\t” + “Name” + “\t” + “Age” + “\t” + “Code”); foreach (ListItem oitem in oListItemCollection) { Console.WriteLine(Convert.ToString(oitem[“ID”]).Trim() + “\t” + Convert.ToString(oitem[“Title”]).Trim() + “\t” + oitem[“Student_x0020_Age”] + “\t” + oitem[“Student_x0020_Code”]); } Console.WriteLine(“Enter Id to update”); int id = Convert.ToInt32(Console.ReadLine()); Console.WriteLine(“Enter EStudent Name”); string EmpName = Console.ReadLine(); Console.WriteLine(“Enter Student Age”); string Age = Console.ReadLine(); Console.WriteLine(“Enter Student Code”); string Code = Console.ReadLine(); ListItemCreationInformation itemCreateInfo = new ListItemCreationInformation(); ListItem oListItem = oList.GetItemById(id); oListItem[“Title”] = EmpName; oListItem[“Student_x0020_Age”] = Age; oListItem[“Student_x0020_Code”] = Code; oListItem.Update(); clientContext.ExecuteQuery(); Console.WriteLine(“Updated successfully”); } else if (optionvalue == 3) { CamlQuery oquery = new CamlQuery(); ListItemCollection oListItemCollection = oList.GetItems(oquery); clientContext.Load(oListItemCollection); clientContext.ExecuteQuery(); Console.WriteLine(“List of items as below”); Console.WriteLine(“Id” + “\t” + “Name” + “\t” + “Age” + “\t” + “Code”); foreach (ListItem oitem in oListItemCollection) { Console.WriteLine(Convert.ToString(oitem[“ID”]).Trim() + “\t” + Convert.ToString(oitem[“Title”]).Trim() + “\t” + oitem[“Student_x0020_Age”] + “\t” + oitem[“Student_x0020_Code”]); } } Console.WriteLine(“Do you want to repeat the option Y/N?”); string optionresult = Console.ReadLine(); if (optionresult == “Y”) { goto startconsole; } } } |
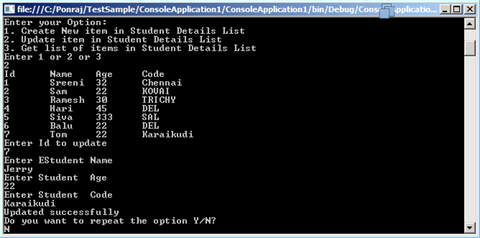
Output as shown below,
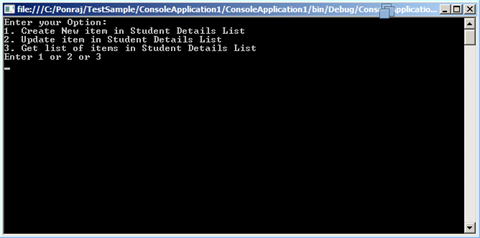
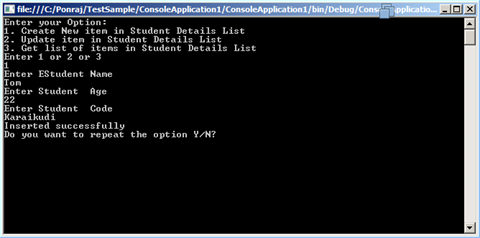
Enter Option 1,
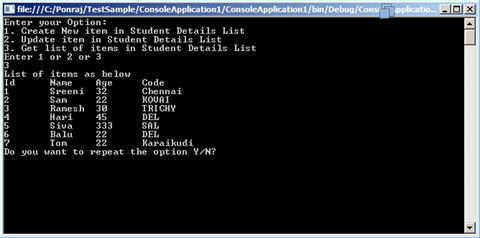
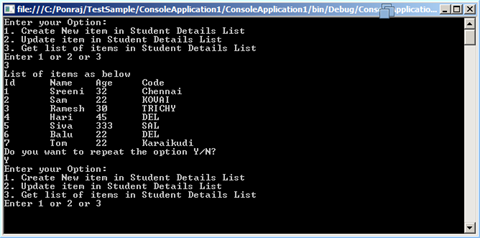
Enter Option 3
Enter Option Y
Enter Option 2

Enter N to exit
Click below to download the solution,
https://1drv.ms/u/s!ArddhCoxftkQg9VJ4aFU07BD91QxkA
CRUD operation with SharePoint List in Visual web part
Document by Ganesan – Ganesanva@hotmail.com – + 919600370429
-
Create EmployeeList in Sharepoint 2010 site with the below Columns.
EmployeeName, Age
- Create a new Visual Web part Project using File –>New Project
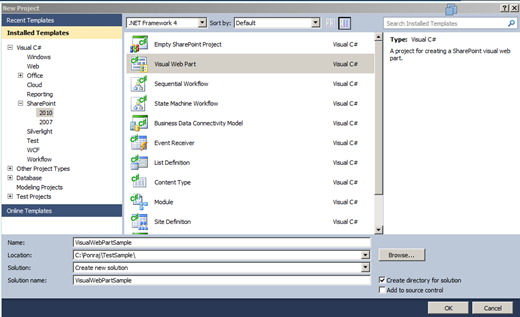
Click Ok.
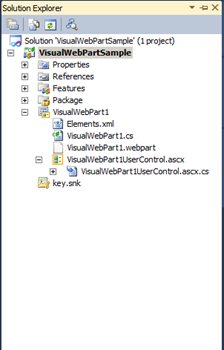
The Solution Explorer will looks as below,
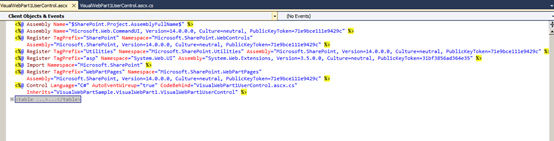
In VisualWebPart1UserControl.ascx Put the below code snippet,
| <table border=”0″ cellpadding=”2″ cellspacing=”2″> <tr> <td colspan=”2″ style=”color:Green”> <asp:Label ID=”lblresults” runat=”server”></asp:Label> </td> </tr> <tr> <td> Employee Name </td> <td> <asp:TextBox ID=”txtEmployeeName” runat=”server”></asp:TextBox> </td> </tr> <tr> <td> Age </td> <td> <asp:TextBox ID=”txtAge” runat=”server”></asp:TextBox> </td> </tr> <tr> <td> </td> <td> <asp:Button ID=”btnSave” runat=”server” Text=”Save” OnClick=”btnSave_Click” /> <asp:Button ID=”btnUpdate” runat=”server” Text=”Update” onclick=”btnUpdate_Click” /> <asp:HiddenField ID=”hfId” runat=”server” /> <asp:Button ID=”btnClear” runat=”server” Text=”Clear” onclick=”btnClear_Click” /> </td> </tr> <tr> <td colspan=”2″> <asp:GridView ID=”grvEmployeeDetails” runat=”server” AutoGenerateColumns=”false”> <Columns> <asp:BoundField DataField=”ID” HeaderText=”ID” /> <asp:BoundField DataField=”EmployeeName” HeaderText=”Employee Name” /> <asp:BoundField DataField=”Age” HeaderText=”Age” /> <asp:TemplateField> <ItemTemplate> <asp:Button ID=”btnEdit” runat=”server” Text=”Edit” onclick=”btnEdit_Click” /> </ItemTemplate> </asp:TemplateField> </Columns> </asp:GridView> </td> </tr> </table> |
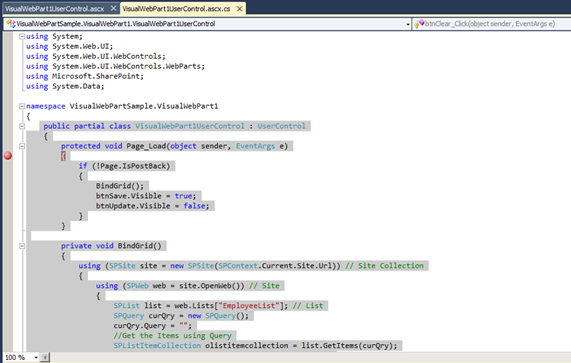
In VisualWebPart1UserControl.ascx.cs put/Replace the below code snippet,
| public partial class VisualWebPart1UserControl : UserControl { protected void Page_Load(object sender, EventArgs e) { if (!Page.IsPostBack) { BindGrid(); btnSave.Visible = true; btnUpdate.Visible = false; } } private void BindGrid() { using (SPSite site = new SPSite(SPContext.Current.Site.Url)) // Site Collection { using (SPWeb web = site.OpenWeb()) // Site { SPList list = web.Lists[“EmployeeList”]; // List SPQuery curQry = new SPQuery(); curQry.Query = “”; //Get the Items using Query SPListItemCollection olistitemcollection = list.GetItems(curQry); DataTable dt = olistitemcollection.GetDataTable(); grvEmployeeDetails.DataSource = dt; grvEmployeeDetails.DataBind(); } } } protected void btnSave_Click(object sender, EventArgs e) { using (SPSite site = new SPSite(SPContext.Current.Site.Url)) // Site Collection { using (SPWeb web = site.OpenWeb()) // Site { SPList list = web.Lists[“EmployeeList”]; // List SPListItem oListItem = list.Items.Add(); oListItem[“Title”] = txtEmployeeName.Text; oListItem[“EmployeeName”] = txtEmployeeName.Text; oListItem[“Age”] = txtAge.Text; oListItem.Update(); BindGrid(); lblresults.Text = “Saved Successfully”; } } } protected void btnEdit_Click(object sender, EventArgs e) { Button btn = (Button)sender; //Get the row that contains this button GridViewRow gvr = (GridViewRow)btn.NamingContainer; hfId.Value = gvr.Cells[0].Text; txtEmployeeName.Text = gvr.Cells[1].Text; txtAge.Text = gvr.Cells[2].Text; btnSave.Visible = false; btnUpdate.Visible = true; } protected void btnUpdate_Click(object sender, EventArgs e) { using (SPSite site = new SPSite(SPContext.Current.Site.Url)) // Site Collection { using (SPWeb web = site.OpenWeb()) // Site { SPList list = web.Lists[“EmployeeList”]; // List SPListItem oListItem = list.Items.GetItemById(Convert.ToInt32(hfId.Value)); oListItem[“Title”] = txtEmployeeName.Text; oListItem[“EmployeeName”] = txtEmployeeName.Text; oListItem[“Age”] = txtAge.Text; oListItem.Update(); BindGrid(); lblresults.Text = “Updated Successfully”; } } } protected void btnClear_Click(object sender, EventArgs e) { txtEmployeeName.Text = string.Empty; txtAge.Text = string.Empty; hfId.Value = string.Empty; lblresults.Text = string.Empty; btnSave.Visible = true; btnUpdate.Visible = false; } } |
Right click on the Project and Click Deploy.
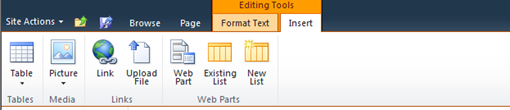
Go to Home Page and Click on Site Actions –>Edit Page
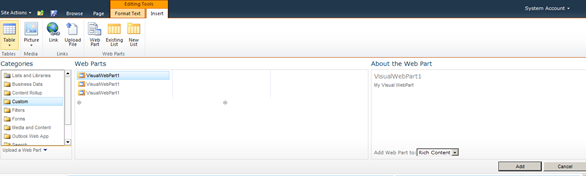
Insert –>Web part in Ribbon.
Select the Web part and click Add.
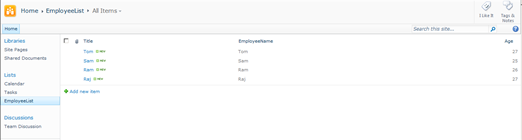
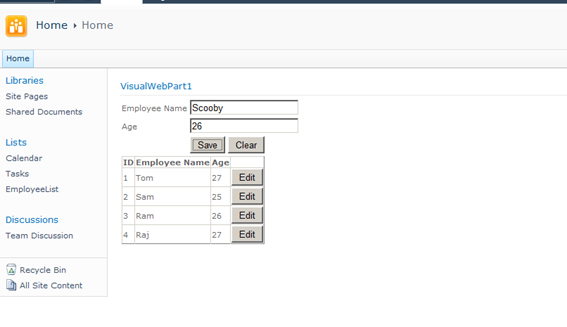
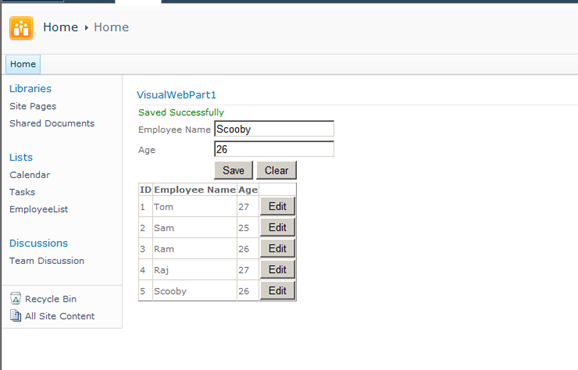
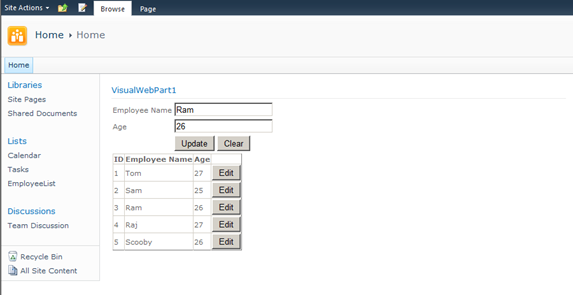
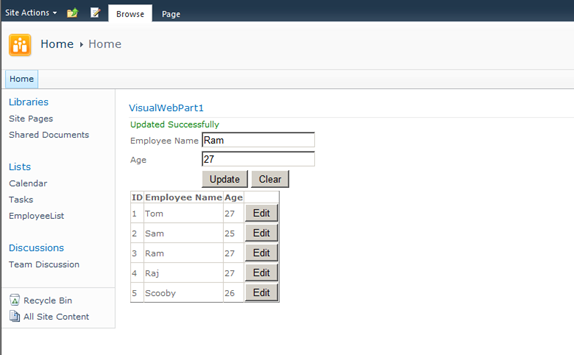
The Output as below,
Click below to download the solution,
https://1drv.ms/u/s!ArddhCoxftkQg6l3ED81o25f4nzffg
Recent Posts
Categories
- All
- Angularjs training in Chennai
- ASP.NET Core
- dot net training
- dot net training in chennai
- dotnet full stack developer
- Free dotnet training
- information on dotnet
- Learn Java in chennai
- Learn Python at Karaikudi
- learn python online
- learn python online from chennai
- Linq Queries in .net
- mutual funds
- MVC Training Tutorials
- PHP Training in Chennai
- pmp training online
- power apps online training
- Python Training Online
- share market
- Sharepoint framework online training
- SharePoint Freelancers in Chennai
- software testing
- spfx online training
- Stock market
- Uncategorized